|
Help->Just Do It!->Step-By-Step
Guide
This guide presents the basic steps of using IphotoDVD to create a video.
More detailed information can be found from the corresponding links.
Step 1: Create a new project
Click the  to create a new project.
More... to create a new project.
More...
Step 2: Add photos
Check "Image" from
Image/Audio Transform, click "Add"
from the "Editorial
Shortcuts" ,search and select the wanted photo or photos, then click "Open",
then repeat until all the wanted photos are added.
More...
Step 3: Select transition effects
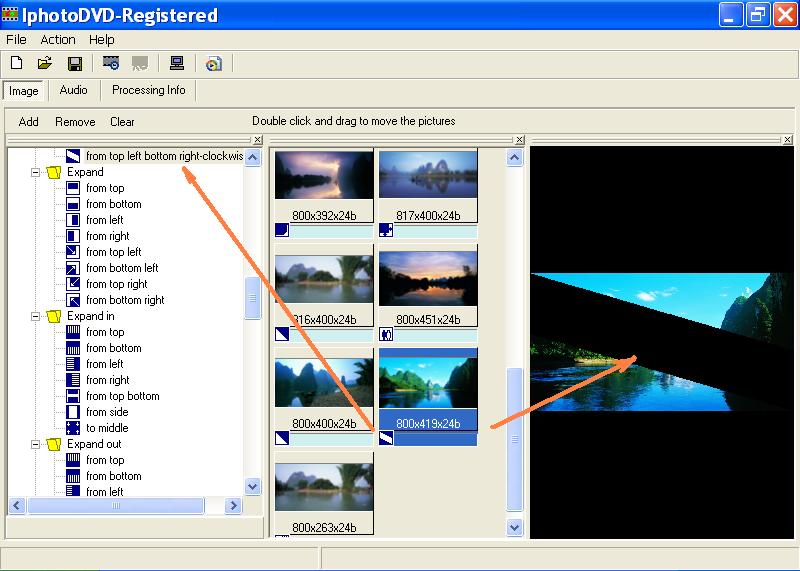
Select the transition style from 'Transition Effect List" for each photo
by clicking the photo then the desired transition style. The default is no
effect. Refer to the screenshot below.
More...


Step 4: Add background music
Check "Audio" from
Image/Audio Transform, click "Add"
from the "Editorial
Shortcuts",
search and select the wanted audio, then click "Open" from the above
window, then repeat until all the wanted audio are added.
More...
Step 5: Make the MPEG file
Now you are ready to create the MPEG file which can be burned into DVD/SVCD/VCD.
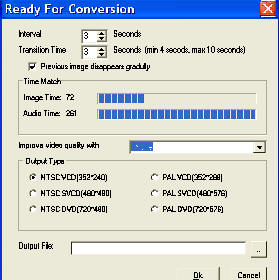
Click the  button to
open a 'Ready For Conversion' form. In this form, you need to determine the
output file name and select the output video system type before clicking 'Ok' to
start the conversion. More... button to
open a 'Ready For Conversion' form. In this form, you need to determine the
output file name and select the output video system type before clicking 'Ok' to
start the conversion. More...

You can use Microsoft MediaPlayer, WinDVD, PowerDVD to play the MPEG file
on your PC.
Step 6: Burn the MPEG file to CD
Of course, you might want to watch your photo show on a VideoCD or DVD player, Burning
Software will be needed, e.x. VideoPak or Nero. This feature will be
integrated to IphotoDVD soon. For this moment, please contact the
manufacturer of your CDR/DVDR for detailed information on burning.

|